A group consists of one or more users (ACCOUNTS > Users > Users). Groups have two key purposes, as described below.
| 1. | To define virtual directories and their associated permissions (e.g. download files, upload files, delete files, list files, etc.). This allows you to manage file transfer access and permissions based on user roles. For example, you may have several users that have access to same directory, but their permissions vary. You can create multiple groups that use the same shared directory, but with varying permissions per group. After the groups are created, assign users accordingly. |
| 2. | To identify email recipients when sharing files ad-hoc using the MFT Server Web Client (My Storage > Share File(s) > Email). |
To quickly access a specific group topic on this page, click on the appropriate link below.
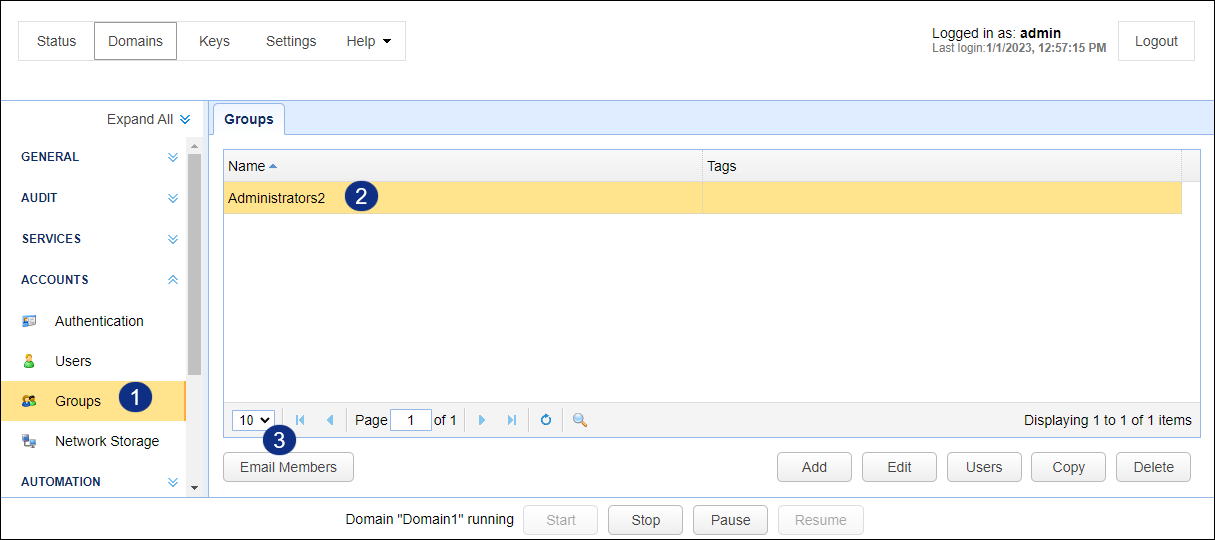
To view a list of groups, click on the ACCOUNTS > Groups module for the desired domain, as depicted in the image below.
Figure 26
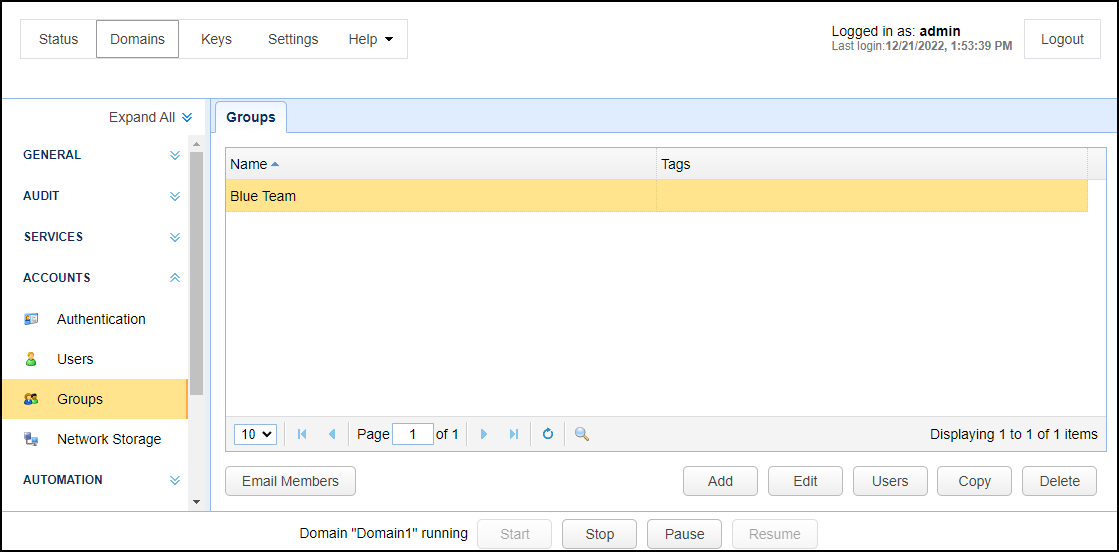
To add a group click on the Add button in the lower right corner. The Add Group dialog will be displayed.
Figure 27
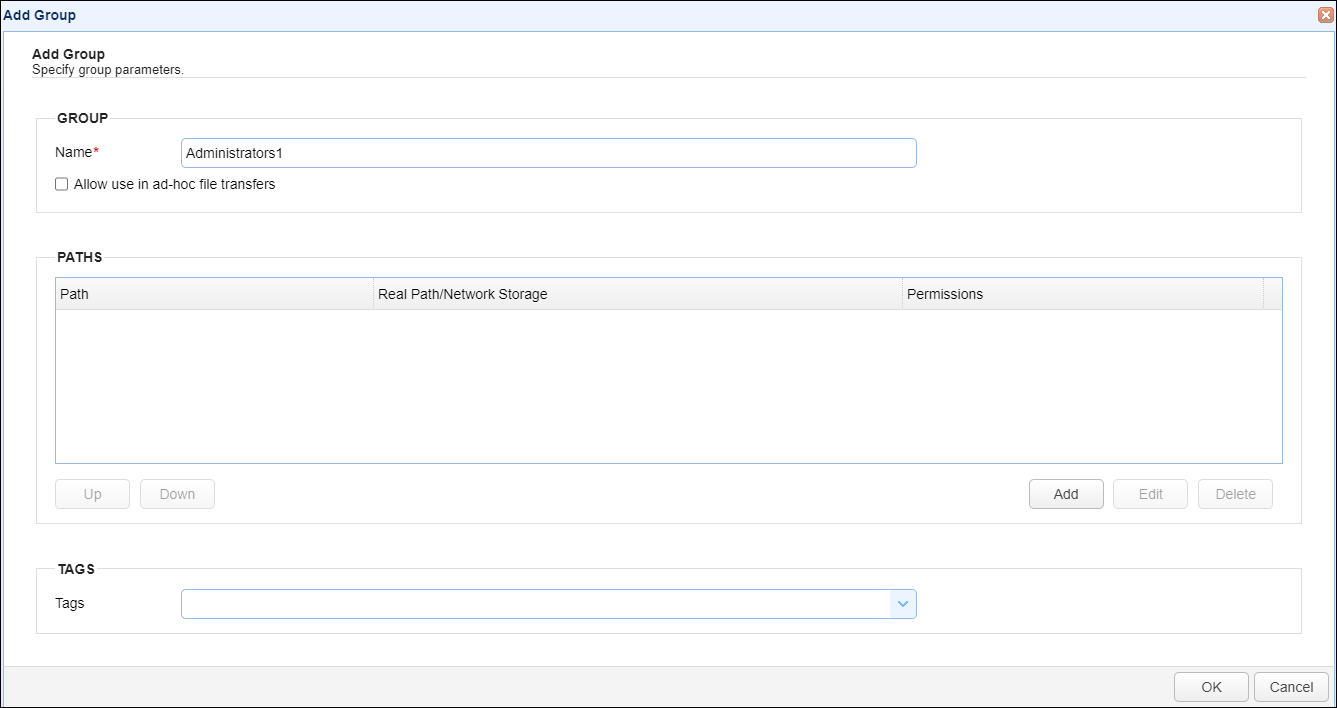
Name - The unique name for this group.
Allow use in ad-hoc file transfers - When checked, this group can be used in the MFT Server Web Client application, when sharing files ad-hoc via email. It is used to identify who to send the email to (To, Cc and Bcc). If a group name is specified in any of these recipient fields, the email will be sent to the members of the group.
PATHS - This section consists of a grid that displays one or more virtual paths associated to the group (if any).
To add a virtual path to the group, please see this topic - Creating virtual paths for a Group
Note: Since groups serve two purposes, it is possible that any given group may be configured to be used for both purposes, or for a single purpose. As a single purpose example, a group may be created strictly to identify email recipients when using the MFT Server Web Client to share files ad-hoc via email. In that case, the PATHS grid of the Add Group dialog would remain empty (because virtual paths are not being defined), and the Allow use in ad-hoc file transfers checkbox would be checked. Alternatively, a group may be created for the sole purpose of defining shared directories and their permissions, and not be used in the MFT Server Web Client share files feature. In that case, one or more paths would be listed in the PATHS grid, and the Allow use in ad-hoc file transfers checkbox would remain unchecked (it is unchecked by default). When a group serves a dual purpose, the PATHS grid would list virtual path(s), and the Allow use in ad-hoc file transfers checkbox would be checked.
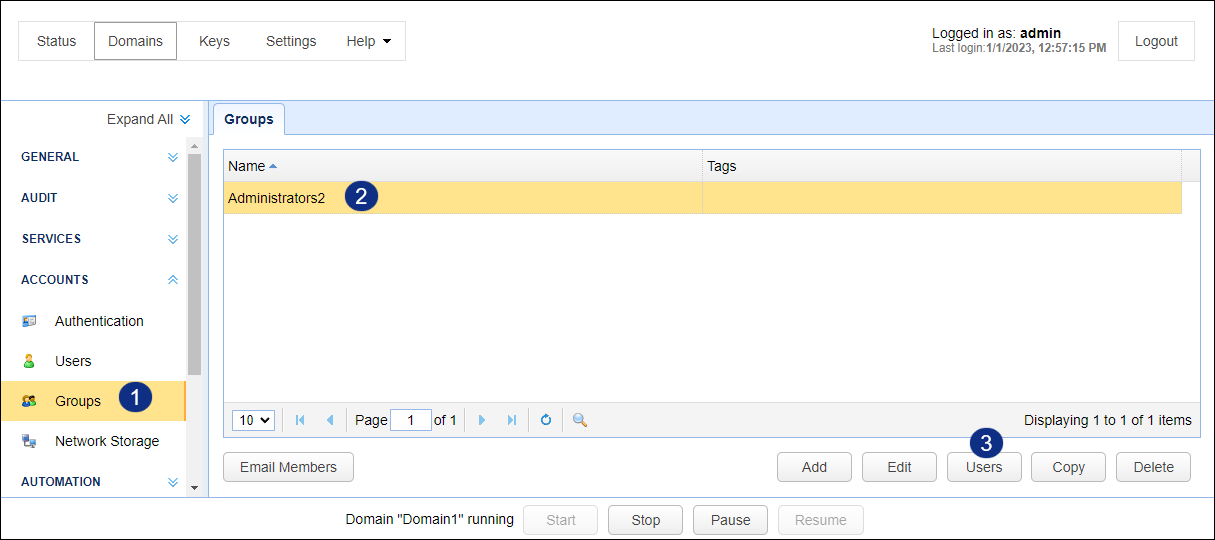
To add users to a group, select an existing group and then click the Users button.
Figure 350
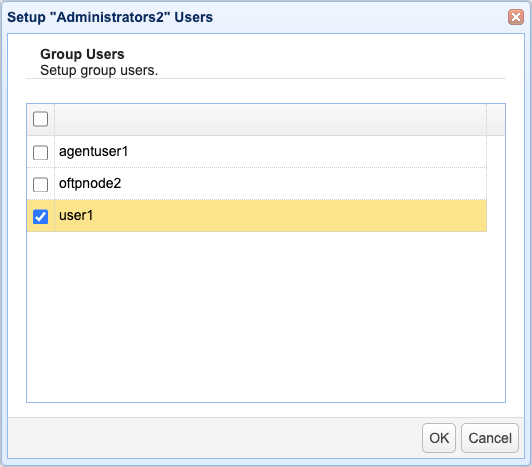
Select the users you wish to add to the group and then click OK,as depicted in the image below.
Note: You can also add or remove a user from a group on the user-level. To do this, navigate to the ACCOUNTS > Users > Users tab. Select the desired user, then click Edit. Click on the Groups field dropdown arrow to display a list of existing groups, if any. To add or remove a user from a group, check or uncheck the desired group's checkbox.
Figure 351
To edit a group, highlight the group name you would like to edit and click the Edit button. The Edit Group dialog is displayed.
Figure 31
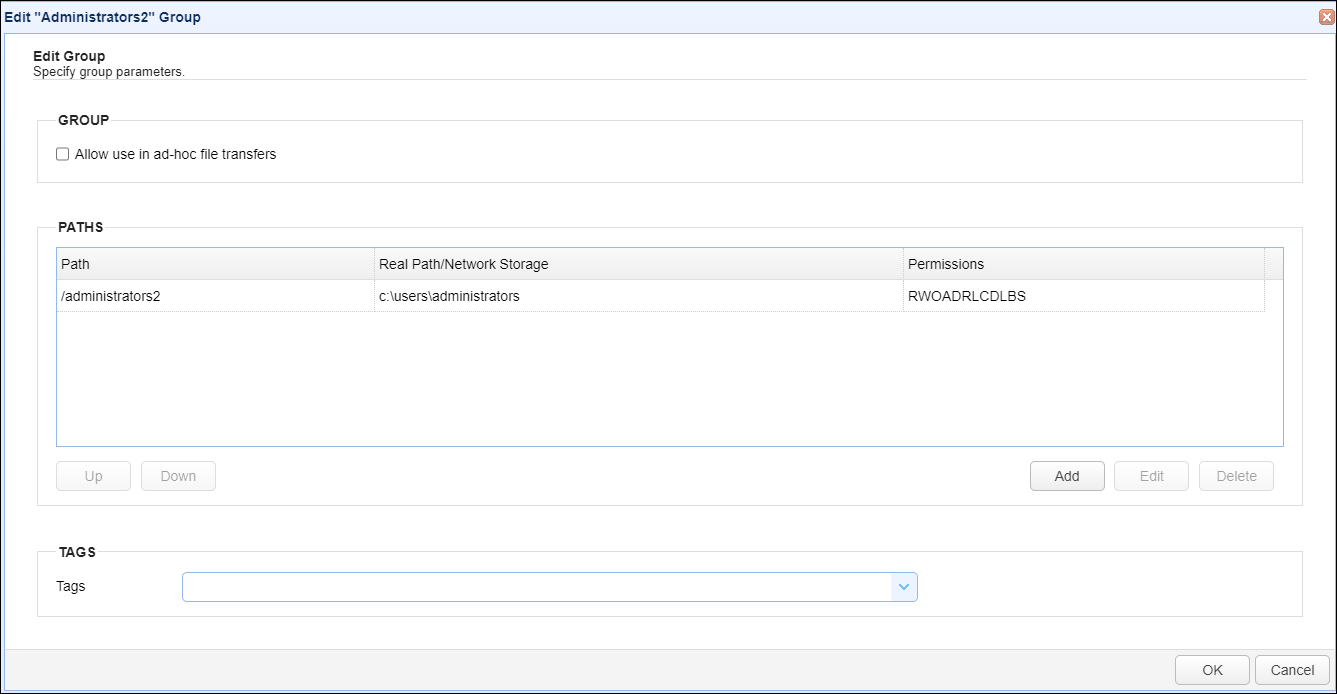
Allow use in ad-hoc file transfers - When checked, this group can be used in the MFT Server Web Client application, when sharing files ad-hoc via email. It is used to identify who to send the email to (To, Cc and Bcc). If a group name is specified in any of these recipient fields, the email will be sent to the members of the group
Paths - This section consists of a grid that displays one or more virtual paths associated to the group (if any).
To add or edit a virtual path in the group, please see this topic - Creating virtual paths for a Group
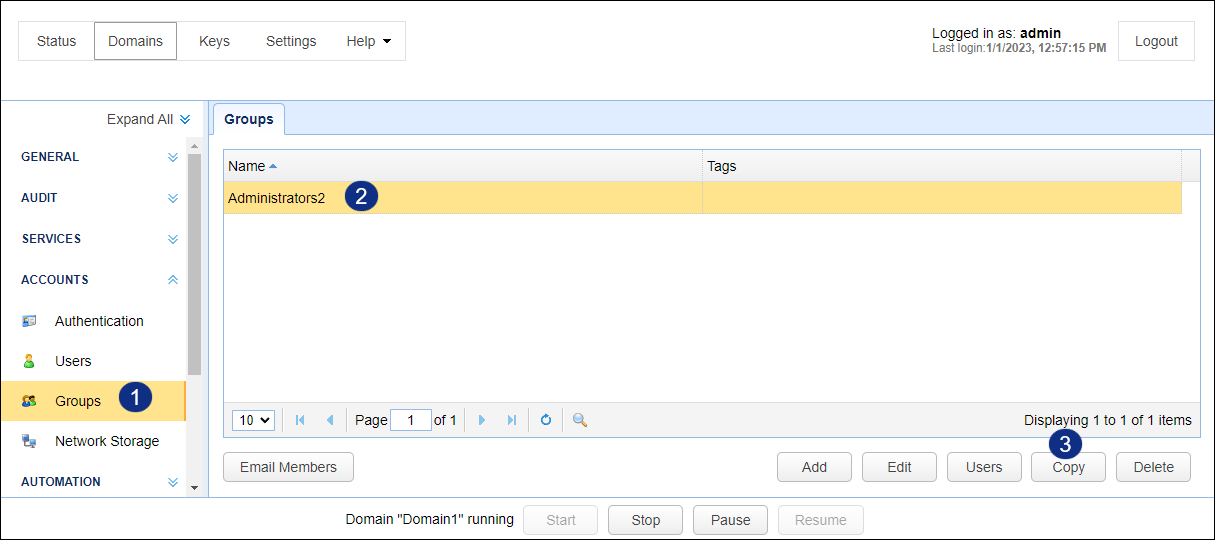
To copy a group, select the group you want to copy and then click the Copy button.
Figure 352
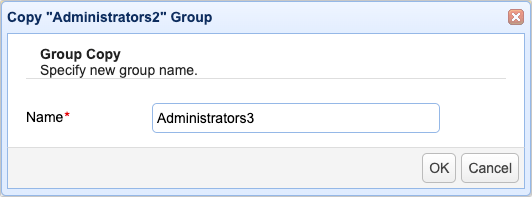
Give the new group a name and then click OK.
Note: When you copy a group, only the group's virtual path details and permissions will be copied. You still have to add users to the newly created group.
Figure 353
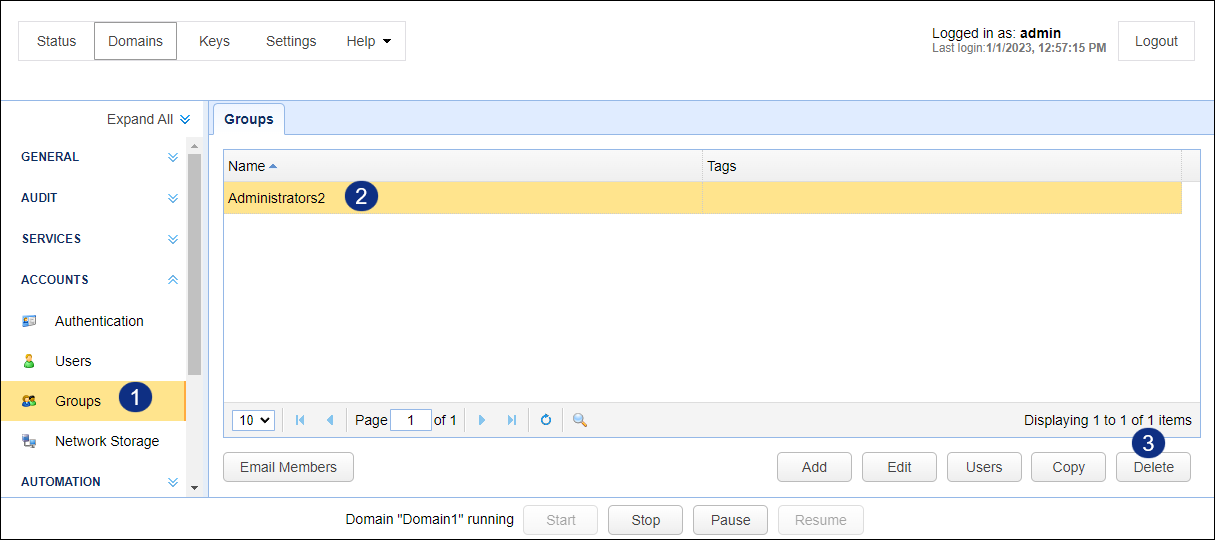
To delete a group, select the group you want to delete and then click the Delete button.
Figure 354
To send an email to members of a particular group, select the group in question and then click the Email Members button.
Figure 356
Enter the subject and message for this email and then click OK.
Figure 355
