Virtual paths are virtual file system paths that map to a physical path on your domain and have their own set of permissions. This allows you to have complete control over what resources users may access on your domain without having to manage users and permissions at the OS level. Virtual paths may be defined at the User account level, or at the Group level. Defining virtual paths at the Group level is recommended when you want to assign multiple users the same set of virtual paths.
Creating virtual paths for a User account
1. From the "Users" node select the User you wish to define the virtual paths for and click the "Edit" button. The "Edit user account" dialog is displayed.
Figure 120
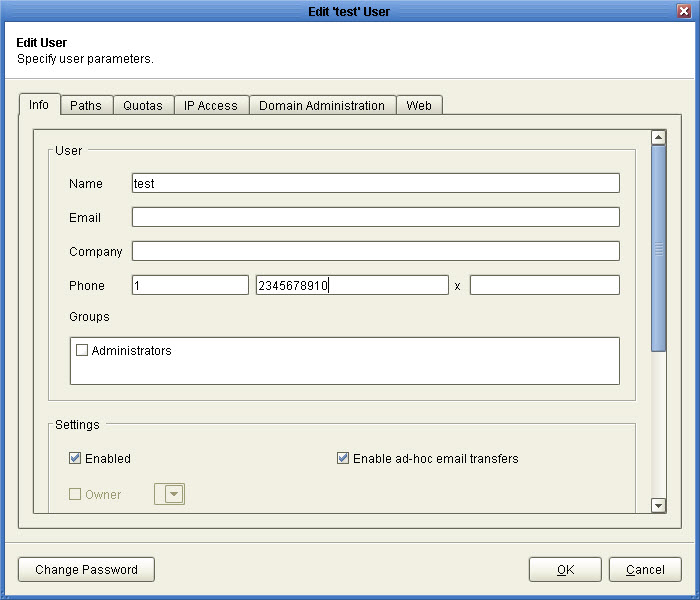
2. Click on the "Paths" tab to see a list of virtual paths for this user. To add a new virtual path click on the "Add" button.
Figure 42
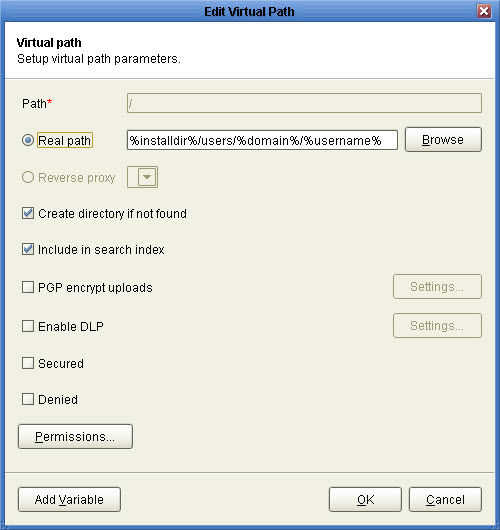
Path - The virtual path that will be made available to the User account. Virtual paths should always start with a slash / character. For example a valid virtual path might be /docs
Real path - The real path on your domain that this virtual path maps to. If you are managing the domain locally then you may use the "Browse" button. If you are managing the domain remotely then you will want to manually type in the directory path.
Reverse Proxy - If you are mapping this path to a Reverse Proxy then select the Reverse Proxy here.
Create directory if not found - Creates directory on server if not found when accessed by user.
Include in search index - If checked files in directory will be indexed for search purposes.
Permissions - Check the permissions that this user will be granted for the virtual path.
3. To finish, click OK. Your new virtual path will be displayed in the virtual path listing for the User account.
Creating virtual paths for a Group
When creating a virtual path for a Group, all Users who are members of the group will have access to the virtual path.
1. From the Groups view select the Group you wish to define the virtual paths for and click the "Edit" button. The "Edit Group" dialog is displayed.
Figure 43
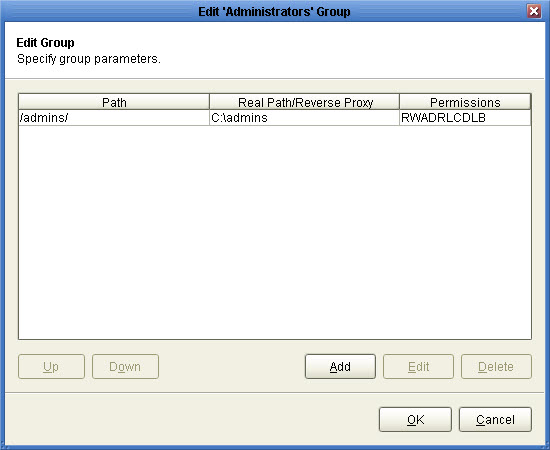
2. A list of virtual paths is displayed at the bottom of the screen for this Group. To add a path click the "Add" button.
Figure 42
Path - The virtual path that will be made available to the User account. Virtual paths should always start with a slash / character. For example a valid virtual path might be /docs
Real path - The real path on your domain that this virtual path maps to. If you are managing the domain locally then you may use the "Browse" button. If you are managing the domain remotely then you will want to manually type in the directory path.
Reverse Proxy - If you are mapping this path to a Reverse Proxy then select the Reverse Proxy here.
Create directory if not found - Creates directory on server if not found when accessed by user.
Include in search index - If checked files in directory will be indexed for search purposes.
Permissions - Check the permissions that this user will be granted for the virtual path.
3. To finish, click OK. Your new virtual path will be displayed in the virtual path listing for the Group.