Multi-factor authentication enables JSCAPE MFT Server to authenticate users using other factors of authentication in addition to the usual username and password. So, for example, JSCAPE MFT Server can be configured to authenticate a user using Domain User Authentication (which authenticates based on what a user knows, i.e. the user's username and password) and Phone Authentication (which authenticates based on what a user has, i.e. the user's registered phone).
JSCAPE MFT Server currently supports these Multi-Factor Authentication service types:
Microsoft Azure Multi-Factor Authentication (a.k.a. PhoneFactor)
Microsoft Azure Multi-Factor Authentication
The Phone Authentication module in JSCAPE MFT Server provides tokenless two-factor authentication support for your user accounts. This is a very secure method of authenticating users in that it combines something users know (their username/password) with something they have (a telephone or cellphone). Using the Phone Authentication module ensures that even if a user's password is stolen their account cannot be compromised.
How it works
| 1. | User authenticates with JSCAPE MFT Server service as normal. |
| 2. | User instantly receives a phone call from Two-Factor Authentication service asking user to confirm this is a valid login. |
| 3. | Upon confirmation, user is logged into their account. |
Enabling Phone Authentication
| 1. | Select the Two-Factor Authentication tab and the Service type you wish to use. |
| 2. | Enter details for service and click Apply. |
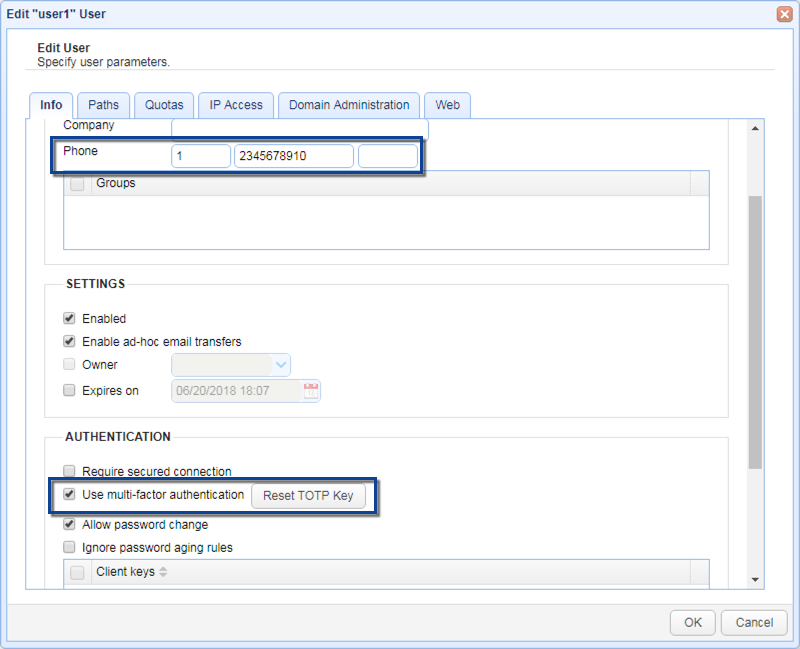
| 3. | Enable the Use phone authentication option for those user accounts that you want to use this service. |
Microsoft Azure Multi-Factor Authentication (a.k.a PhoneFactor) is a multi-factor authentication service provided by Microsoft. To use this service you must first create an Azure account and Download Azure Multi-Factor Authentication SDK for Java. Upon downloading the SDK, extract the ZIP archive and copy the files license.xml and cert.p12 to the License directory. See Figure 119.
Figure 119
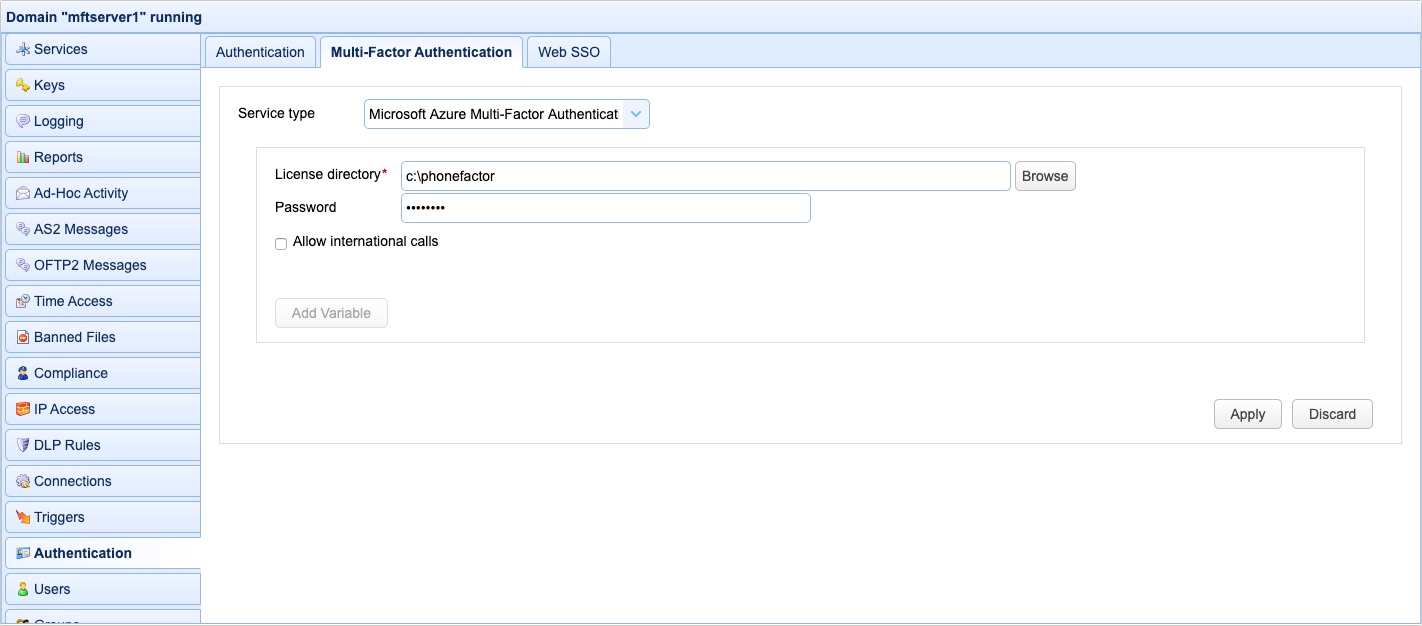
License directory - The directory containing your Microsoft Azure Multi-Factor Authentication SDK license and private key files.
Password - Your Microsoft Azure Multi-Factor Authentication account password. This password can be found in the private-key-password.txt file that was provided as part of the Microsoft Azure Multi-Factor Authentication download.
Allow international calls - If checked fee based calls may be made to areas outside of the free Global Services locations defined by Microsoft Azure Multi-Factor Authentication.
Figure 120
Note
Make sure that you enter the country code and phone number (including any area code) in the Phone field for your users using this service. The first field is your country code (1 for the United States), the second field is your phone number (including any area code), the third field is an optional extension. It is important that you do not include any non-numeric values in your phone number (e.g. hyphens, parenthesis etc.). This will be the number that is called when performing phone authentication.
Time-based One-Time Password (TOTP)
This enables JSCAPE MFT Server to authenticate users logging in via the web interface by using the TOTP protocol.
How it works
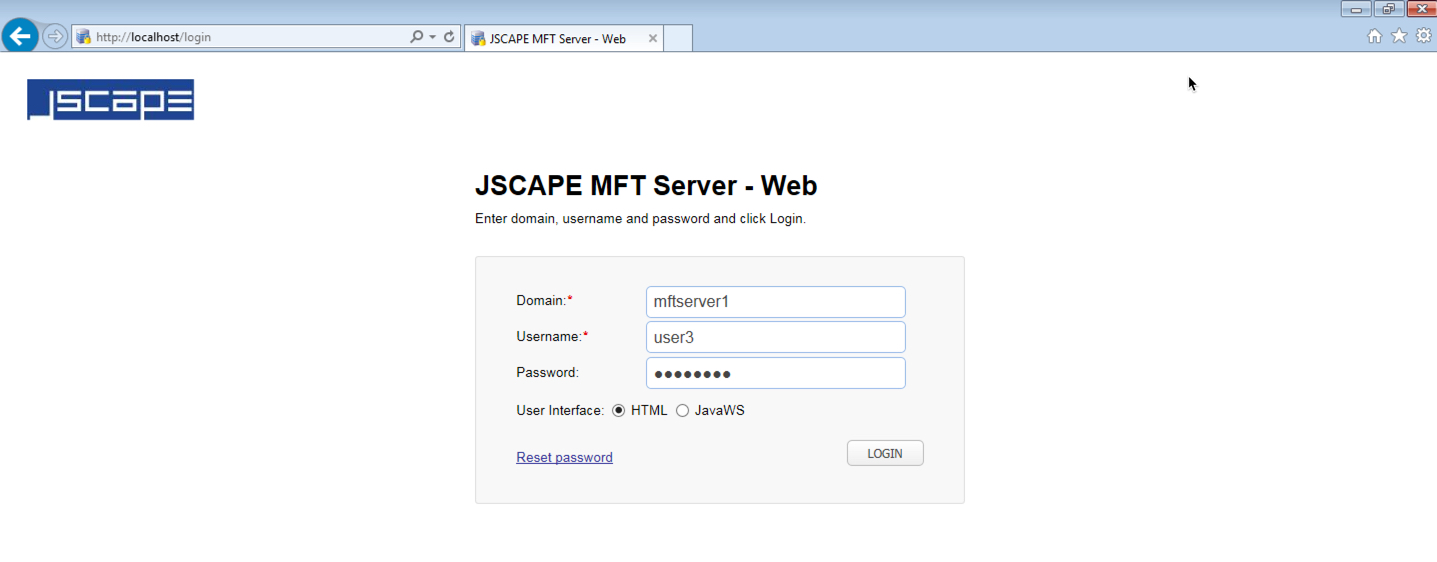
1. User logs in via the web interface as normal.
Figure 261
If TOTP is enabled AND "Use multi-factor authentication" option is enabled for this particular user, AND a shared secret does not already exist for this account, then a QR code will be shown in the user's browser along with a shared secret key.
Figure 262
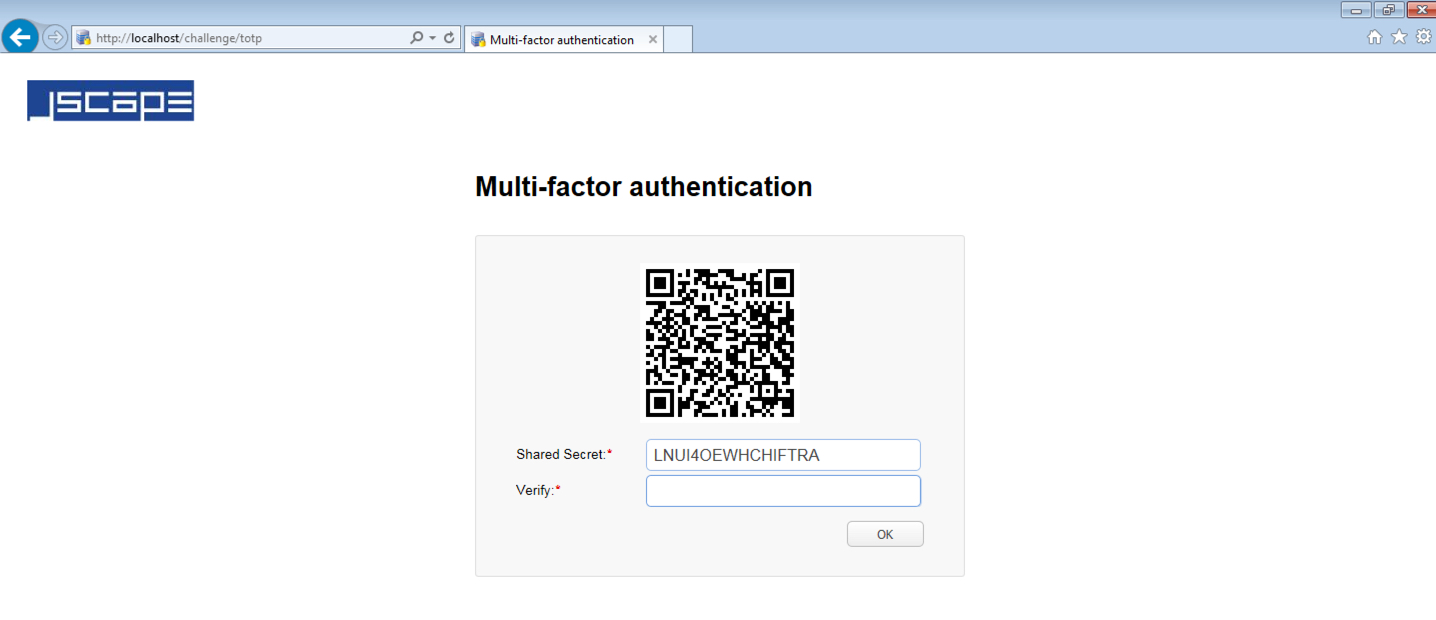
2. Upon seeing the QRCode and secret key, the user either scans the QR code or manually types in the shared secret key into a TOTP app (e.g. GoogleAuthenticator). After which, the app should then generate a unique TOTP code (e.g. 259 111, as shown in Figure 263), which the user can then enter into the Verify field.
Here's an example of what might appear on the Google Authenticator mobile app:
Figure 263
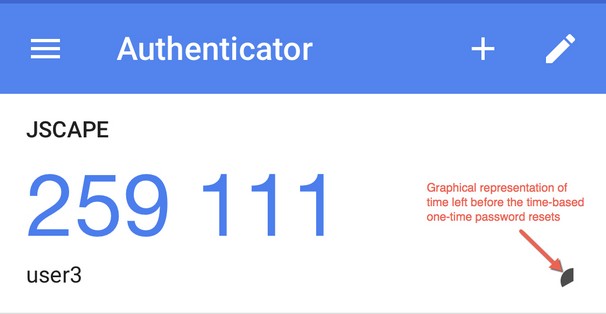
As its name implies, the time-based one-time password (TOTP) will only be valid up to a certain period of time (typically 30 seconds). When that time expires, a new TOTP will be automatically generated. When logging in, the user should use the current TOTP. All previous TOTPs won't work.
3. In succeeding logins, the user will no longer have to scan the QR code or manually enter the shared secret key. All the user has to do to login is to copy whatever TOTP is shown in the TOTP app and enter that into the Verify field.
Using custom authentication you may define your own custom multi-factor authentication class.
To use custom authentication in JSCAPE MFT Server, follow these general steps:
Note: For steps 1 - 2, refer to the sample source code of a multi-factor authentication class at the bottom of this page.
1. Implement com.jscape.inet.mftserver.operation.authentication.ConfirmationService interface for the authentication service
e.g.
package com.jscape.inet.mftserver.operation.authentication;
...
import com.jscape.inet.mftserver.operation.authentication.credentials.AuthenticationCredentials;
...
public class ConfirmationServiceExample implements ConfirmationService {
...
}
2. Provide a no-args constructor for the authentication service
e.g.
public ConfirmationServiceExample() {
...
}
3. Put a jar file of the authentication service implementation in the [JSCAPE MFT Server installation directory]/libs folder and restart JSCAPE MFT Server.
4. Specify the authentication service class in the Authentication class field found in the Authentication > Multi-Factor Authentication panel
Figure 264
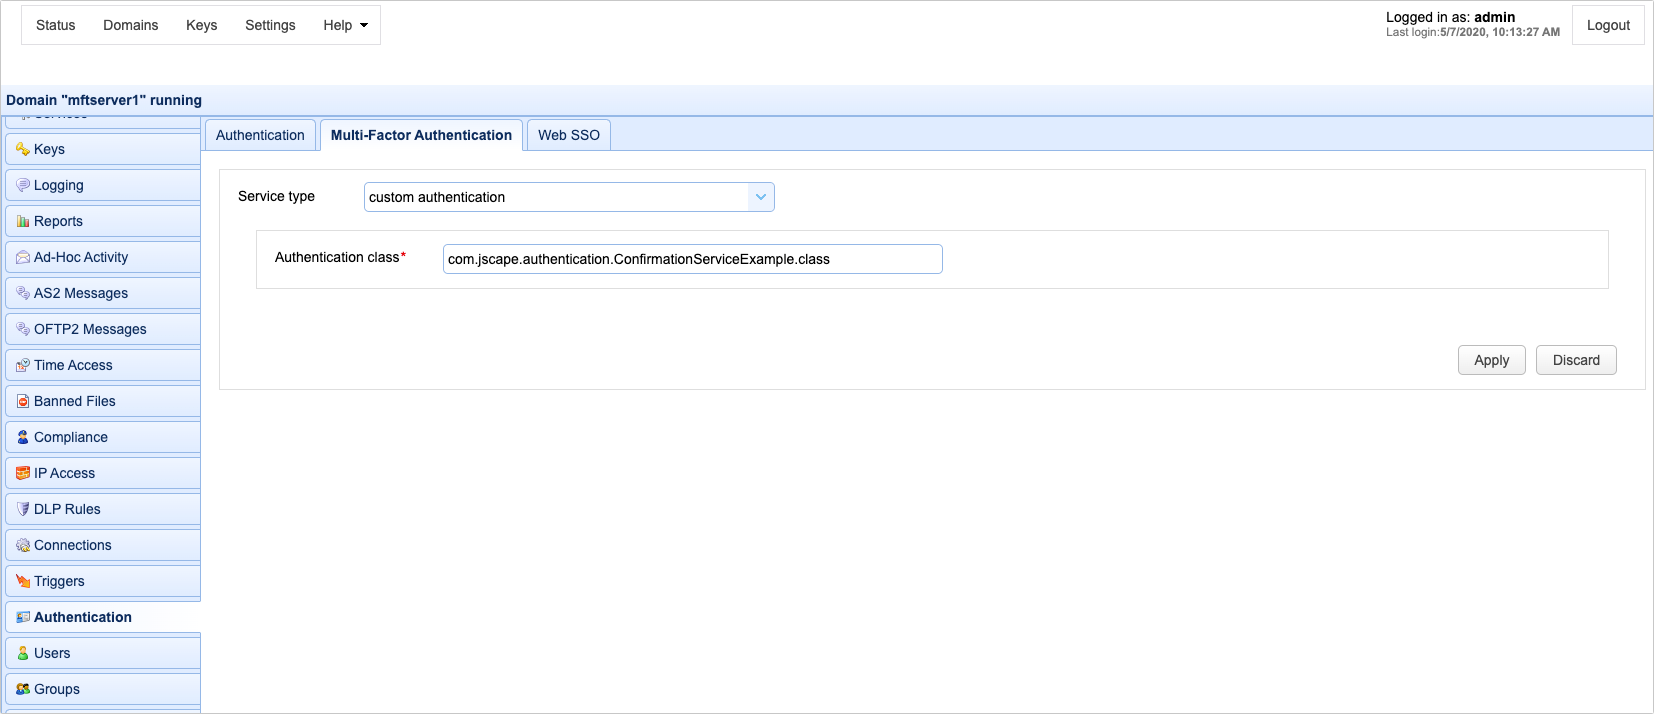
Authentication class - The custom multi-factor authentication class name.
Sample multi-factor authentication class source code:
package com.jscape.inet.mftserver.operation.authentication;
import com.jscape.inet.mftserver.operation.authentication.credentials.AuthenticationCredentials;
import com.jscape.inet.vfs.Account;
import com.jscape.inet.vfs.Phone;
public class ConfirmationServiceExample implements ConfirmationService {
public ConfirmationServiceExample() {
}
public void confirm(Account account, String protocol,
AuthenticationCredentials credentials) throws OperationException {
// get account phone number
Phone phone = account.getPhone();
String countryCode = phone.getCode();
String number = phone.getNumber();
try {
// send multi-factor authentication request to user via phone
} catch (Exception e) {
throw new OperationException(e);
}
}
}