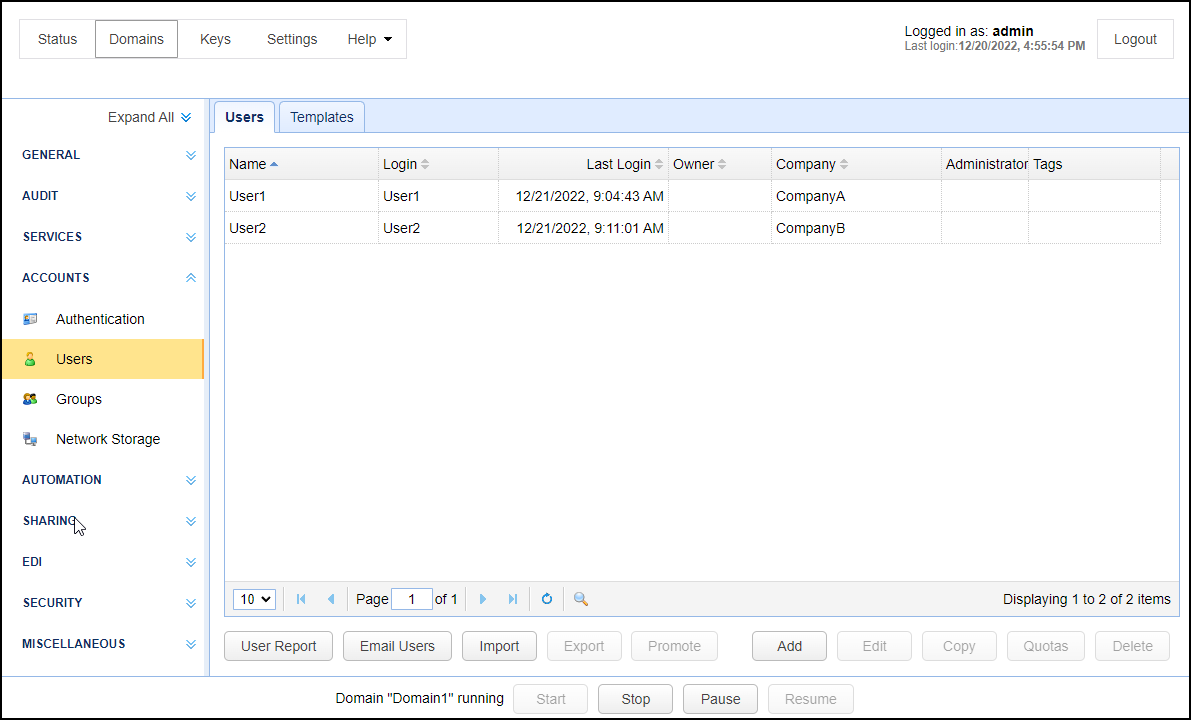
A user is a valid account that may login to a domain's service. To view a list of users click on the ACCOUNTS > Users module for the desired domain. The Users tab will be active by default.
Figure 15

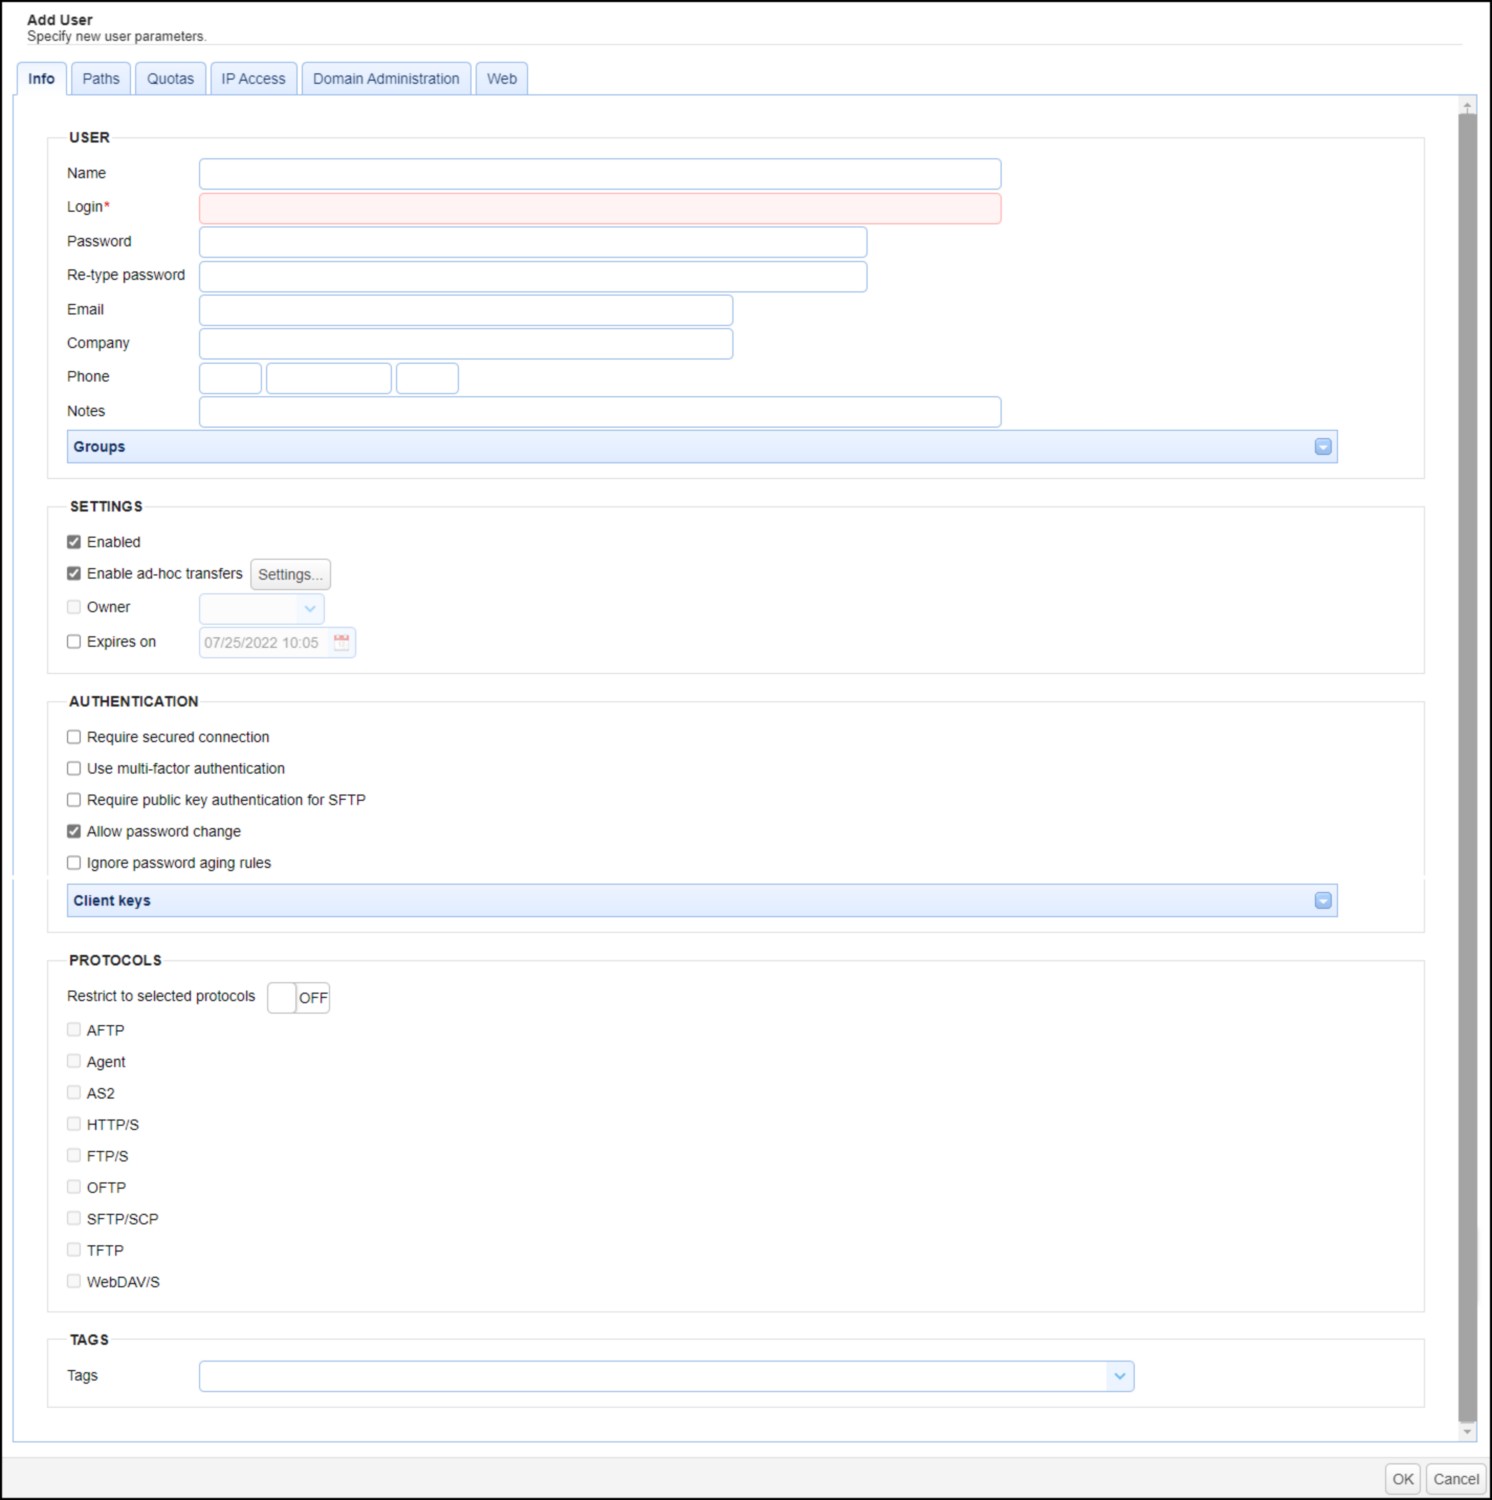
To add a user click on the Add button in the lower right corner. Choose a Template or accept the Default template and then click the OK button. The Add User dialog will be displayed.
Figure 16

User
Name - The full name of this user.
Login - The login name for this user.
Password - The password for this user.
Re-type password - The password for this user.
Email - Optional email address for this user.
Company - The company that this user is associated with.
Phone - The phone number for this user. The first field is the country code (e.g. "1" for United States) and the second field is the telephone number including any area code, the third field is the phone extension. This field is used primarily in conjunction with Phone Authentication.
Notes - Use this field to enter internal owner information, user notes/descriptions, and just about any piece of relevant information that doesn't fall into any of the other fields provided
Groups - Optional groups that this user is a member of.
Settings
Enabled - Check to enable this account.
Enable ad-hoc transfers - Click on the Settings button. A new window will load with 3 possible ad-hoc options you can check to enable.
| • | Share files via email - Check to allow user the ability to perform ad-hoc email transfers via HTTP interface. One or more files and/or directories can be selected. |
| • | Share files with internal users - Check to allow user the ability to share one or more files and/or directories with internal users (users in their MFT Server Domain). |
| • | Share files via anonymous links - Check to allow user the ability to share one or more files and/or directories using an anonymous link. |
Note: Administrators can restrict ad-hoc sharing capabilities at the virtual path level, even when the ad-hoc setting is enabled as described above. Virtual paths are defined for users, user templates and groups. In the Users module, you will see a Paths tab when adding or editing a user or user template. This is where virtual paths are configured and permissions are assigned. In the Groups module, virtual paths are configured when adding or editing a group. The permission that allows the sharing of files stored in the virtual path is named "Share files". If this permission is not checked, then the user will not be able to share the files stored in the virtual path. Note, group permissions take precedence over individual user permissions.
Owner - Optional login of user who owns/manages this account.
Expires on - Date that this account expires (leave blank for non-expiring account).
Authentication
Require secured connection - Check to force user to login using secure protocol (e.g. FTPS/SFTP/HTTPS).
Use multi-factor authentication - Check to require user to use two-factor phone authentication.
Require public key authentication for SFTP - Check to require user to authenticate using public key authentication when connecting using SFTP, regardless of whether the SFTP service is configured to support public key authentication.
Allow password change - Check to allow user to change their password.
Ignore password aging rules - Check to disable password aging rules for this user.
Client keys - Optional public-keys bound to this user for purposes of public-key authentication in SFTP/SSH protocol, or client certificate authentication in SSL protocols.
Protocols
Restrict to selected protocols - Off by default.
When the feature is OFF, the user can connect to the MFT Server using all services (e.g. FTP/S, SFTP etc.) defined on the domain.
To restrict the protocols, click the OFF button to turn this feature on. The button's label will change from OFF to ON, and the check box next to each protocol name will be enabled. Check one or more protocols that the user is allowed to connect to the MFT Server with. If the user attempts to connect with a protocol that has not been checked, the connection will be rejected displaying a "Connection not allowed" error.
Tags
Tags may be used to limit visibility of users to administrators that are assigned a role containing specified tag.
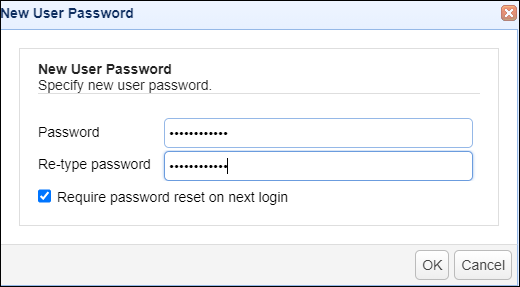
Note: When you edit a user, you have the option to change their password by clicking on the Change Password button. When the New User Password window pops up, you have the option to force the user to reset their password the next time they login. Check the Require password reset on next login checkbox to accomplish this, as depicted in figure 371.
Figure 371

See also