Okta is an identity management service. It gives users access to various software with one successful Okta log in. This example provides step-by-step instructions on how to set up the MFT Server Manager application in Okta and in the MFT Server Manager interface. When complete, an MFT Server Administrator will be able to log in to the MFT Server Manager application using Okta.The images provided under the Okta Instructions are taken from the Okta Admin console. Most images are snippets and not the complete page.
Okta Instructions
1. Sign in to the Okta admin console.
2. Using the left sidebar menu, navigate to Applications > Applications.
3. Click on the Create App Integration button.
4. In the Create a new app integration pop-up dialog, choose SAML 2.0 and click Next.
In the Create SAML Integration dialog:
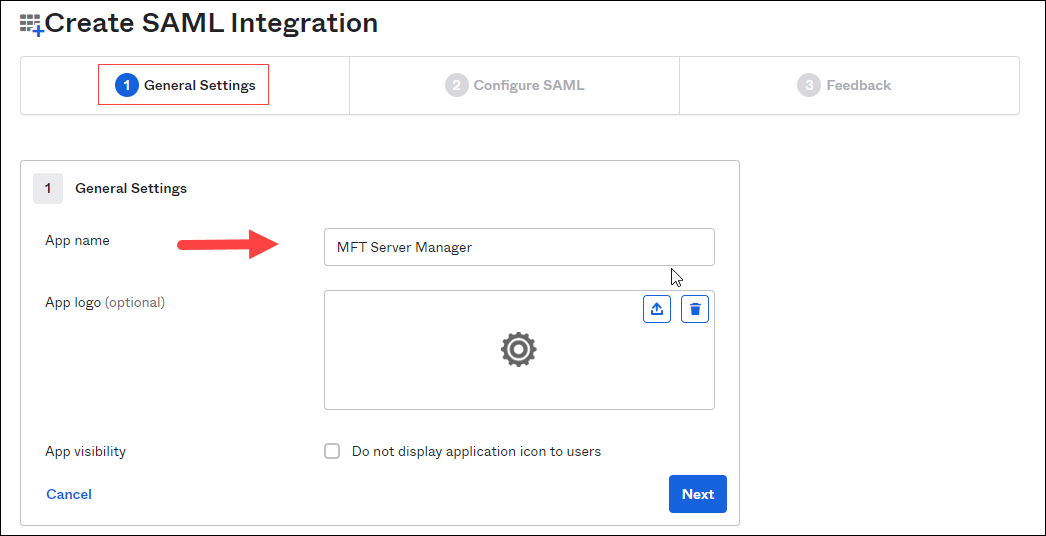
5. (1) General Settings - enter an App name (for example: MFT Server Manager). See figure 408. Click Next.
Figure 408
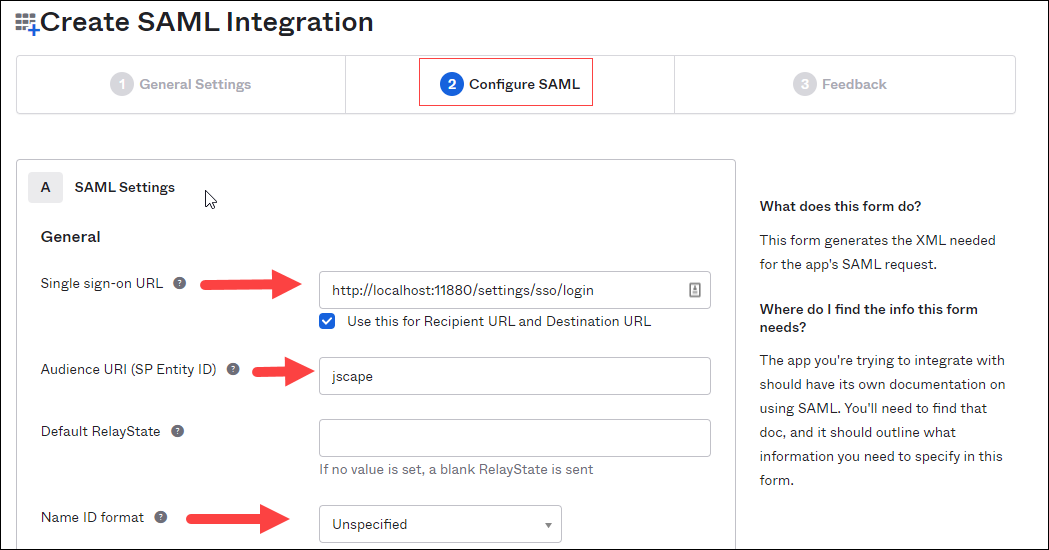
6. (2) Configure SAML, enter values for the following: (See figure 409).
a. Single sign-on URL - use the URL format: http://[hostname:administrative_port]/settings/sso/login (for example: http://localhost:11880/settings/sso/login).
b. Audience URI (SP Entity ID) - any ID (for example: jscape).
c. Name ID format - This value should remain Unspecified. Click Next.
Figure 409
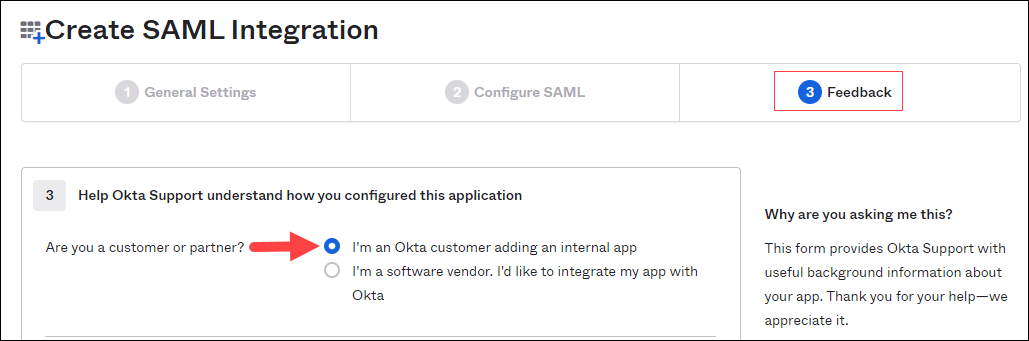
7. (3) Feedback: select I'm an Okta customer adding an internal app, then click Finish. See figure 410.
Figure 410
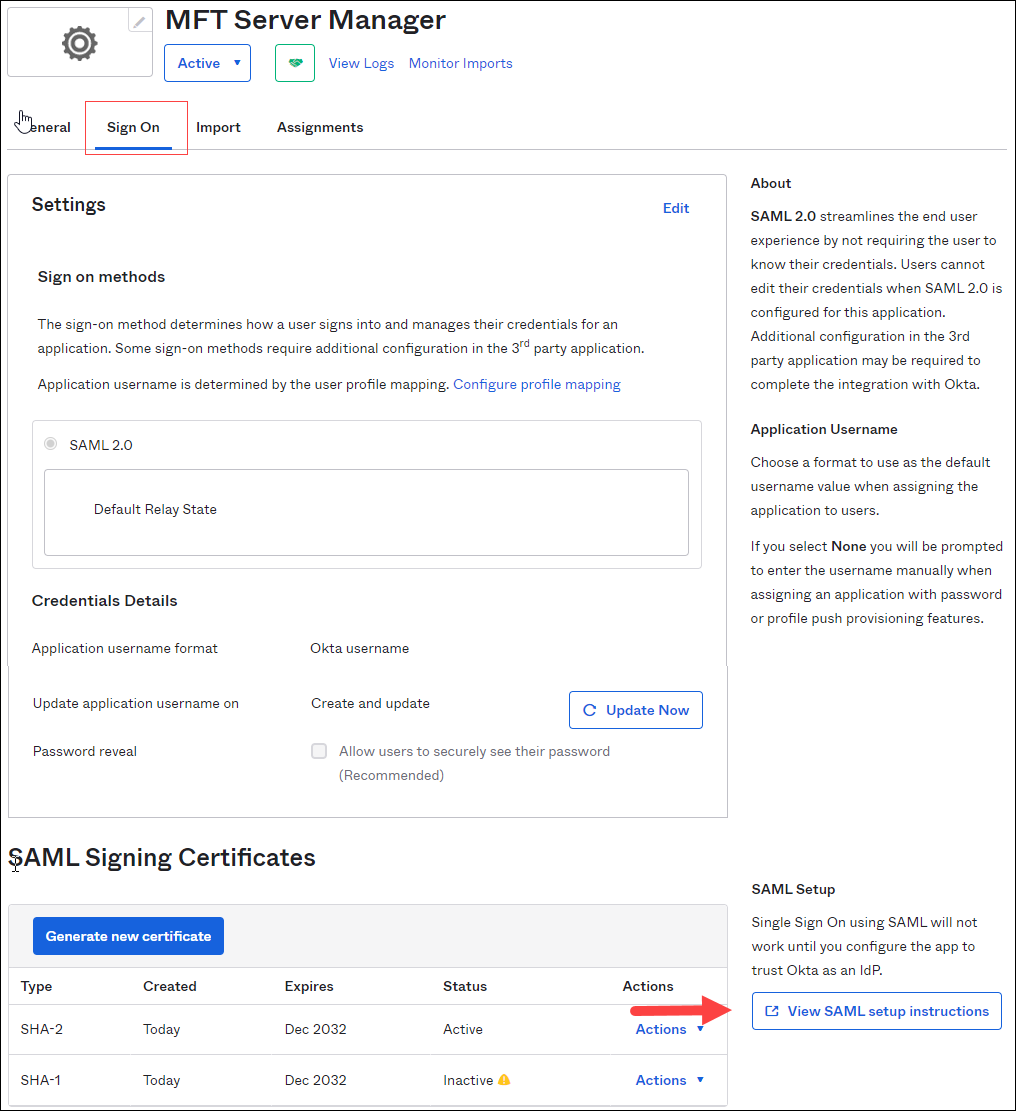
The page will refresh displaying the App name you entered previously, and the Sign On tab will be active. See figure 411.
8. On this page, scroll down to the SAML Signing Certificates section. then click on View SAML setup instructions.
Figure 411
9. A new page will open with Idp details. Copy the Identity Provider Single Sign-On URL value and download the X.509 Certificate. You will need the URL and certificate when configuring this feature in the MFT Server Manager application.
10. Using the left menu, navigate back to Applications > Applications.
11. Click the Assign Users to App button. Check the following:
a.Under the Application & Label list, check the application you specified in Step 5.
b.Under the Person & Username, check the User who will be accessing the MFT Server Manager. See figure 419. Click Next.
Figure 419
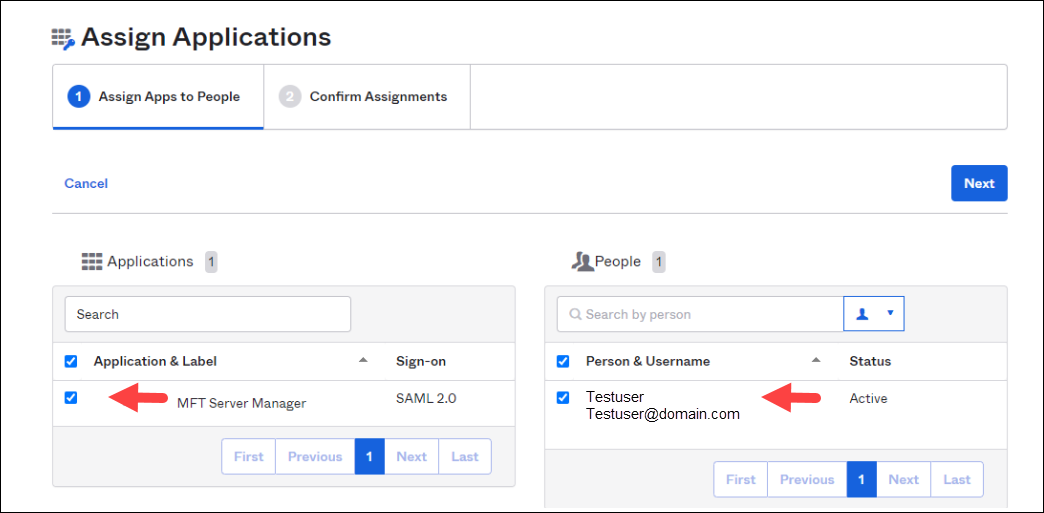
12. Click on Confirm Assignments button.
This completes the Okta configuration.
MFT Server Instructions
Launch the MFT Server Manager interface.
Click on Keys > Host Keys. Click on Import, then select Import File from the dropdown list. The Import Public Key dialog will appear.
Key alias - enter the desired alias name.
Key file - enter the file name you downloaded in Step 9 of the Okta instructions.
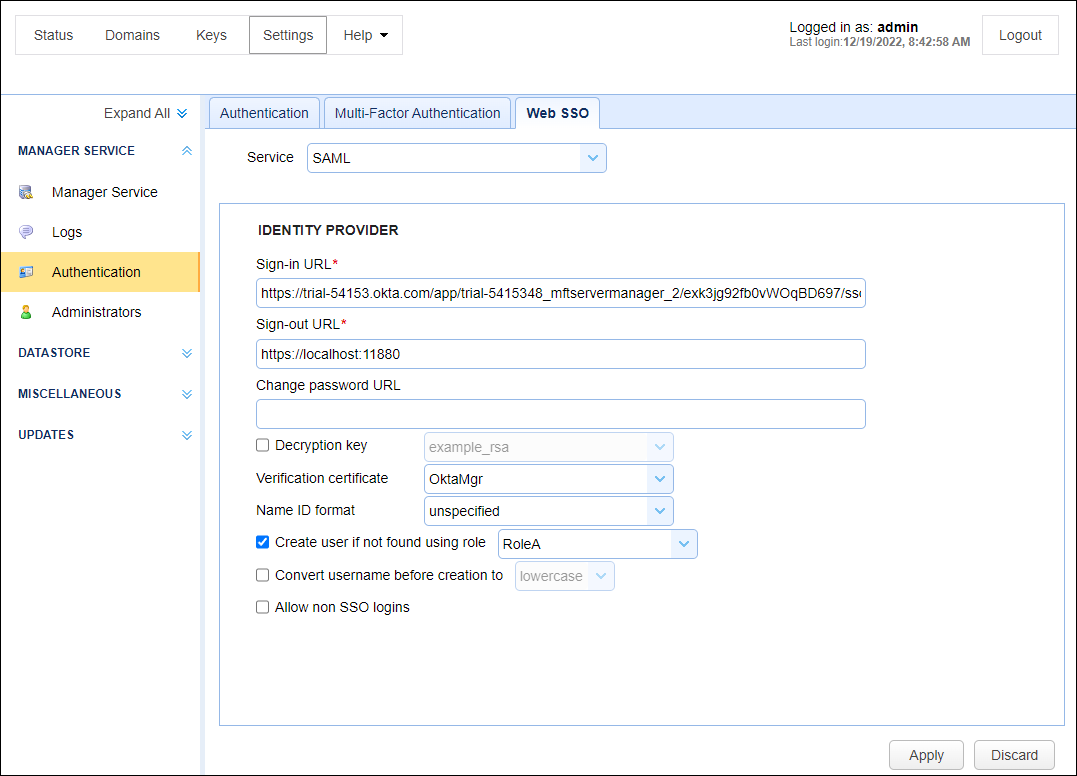
Click on Settings > MANAGER SERVICE > Authentication > Web SSO tab.
Service - select SAML from the dropdown list.
Sign-in URL - paste the URL you copied in Step 9 of the Okta instructions.
Sign-out URL - enter the desired sign-out URL (for example:. http://localhost:11880).
Verification Certificate - select the Host Key that you imported into Keys > Host Keys.
Create user if not found using role - check this box to allow the system to create the Admin user if they don't already exist in the Settings > MANAGER SERVICE > Administrators > Administrators grid.
Log in to the MFT Server Manager using a URL with this format: http://<host>:<port>/settings/sso/login (for example: http://localhost:11880/settings/sso/login).
If you have already authenticated with the Okta identity provider, you will be automatically logged in to the MFT Server Manager application.
If you have not authenticated with the Okta identity provider, you will be presented with the Okta log in page. If you successfully authenticate, the MFT Server Manager application will load.
Note: New Admin user - If the user logging in is a new Admin user, not yet in the Settings > MANAGER SERVICE > Administrators > Administrators grid, the same behavior will occur as described above only if the Create user if not found using role field is checked, as depicted in figure 412. When checked, the Admin user is automatically added to the Administrator table after the first-time they successfully authenticate. If the Create user if not found using role field is not checked, the user will be presented with the standard MFT Server Manager log in page and they will not be able to log in using Okta SSO. If Allow non SSO logins is not checked (as depicted in figure 412), then only Okta SSO log in's will be allowed.
Figure 412