The SHARING > Contacts module may be used to manage email contacts for use in ad-hoc email transfers. In sending an ad-hoc email transfer recipients may be selected from the SHARING > Contacts module rather than typing in the email address each time. Contacts may be defined as private (visible only to the user that created the contact) or public (visible to all users for the domain).
Contacts without an owner are considered private contacts. Contacts may be created/managed from either the SHARING > Contacts module in MFT Server Manager or via the Contacts module in the web interface under My Account. A web interface user can also create a contact on-the-fly when sharing files via email (My Storage > Share File(s) > Email) by clicking on the To field's plus (+) icon which will pull up the Add Contact dialog. By default, contacts created in the web interface are private contacts visible only to the user that created them unless user has domain administration rights and the ability to create public contacts.
Figure 144
Add
To add a contact, click on the Add button. Figure 145 depicts the Add Contact dialog window.
Figure 145

Name - The full name of the contact.
Email - The contact email address.
Company - The company name of contact.
Owner - The owner of contact. If an owner is selected then contact will be marked as private and will only be visible to the owner, otherwise contact will be marked as public and will be visible to all users for the domain.
Tags - If used, tags may limit the visibility of this contact for other administrators.
Import
To Import one or more contacts, click on the Import button. Figure 384 depicts the Import Contacts dialog window.
Figure 384
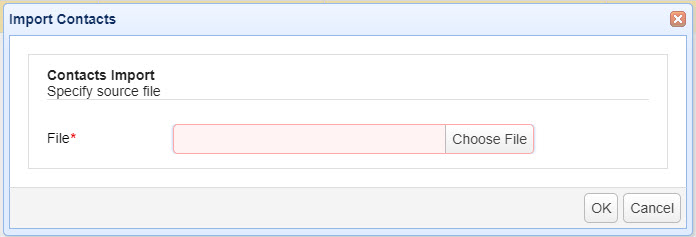
File - This the JSON file that contains one or more contacts. The JSON file must be in a format supported by MFT Server.
Drag and drop method to import the file.
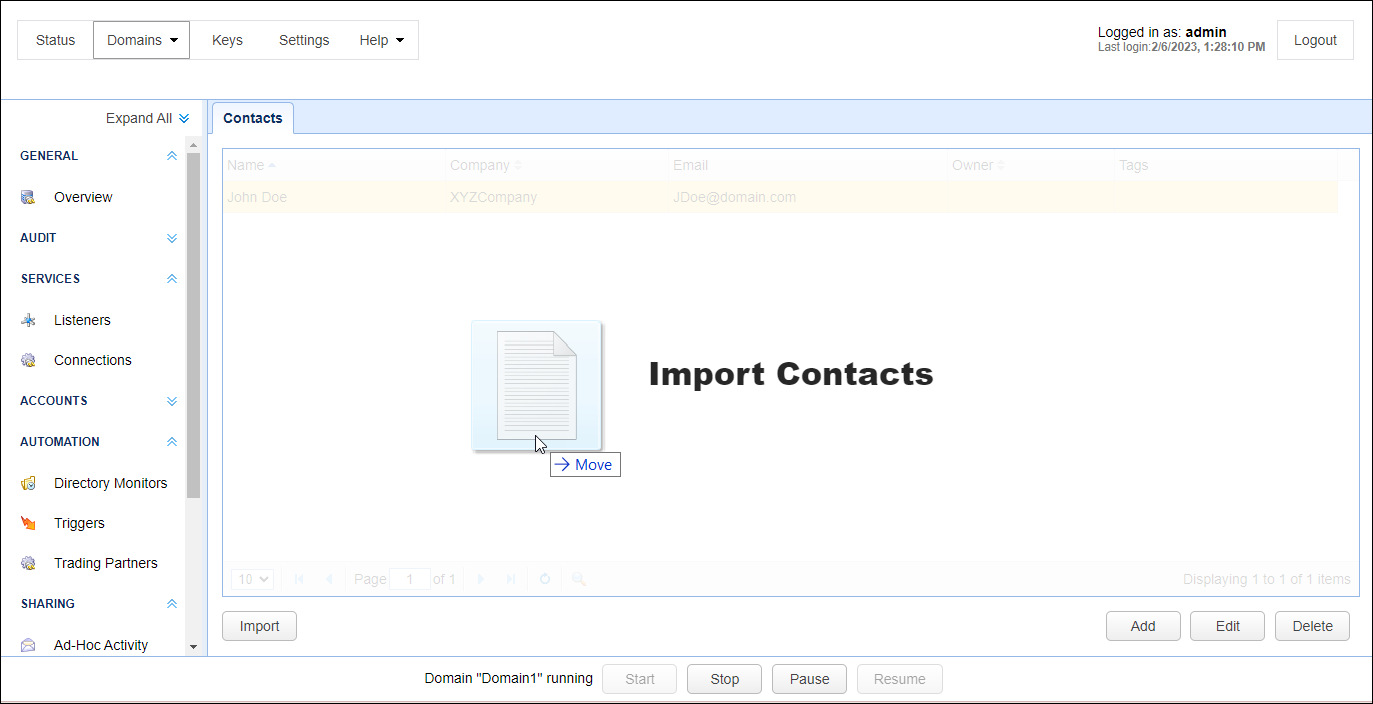
You can also drag your JSON contacts file from its operating system location, and when you see the image below (figure 472), drop it on the Contacts grid. The Import Contacts window will appear as depicted above in figure 384. The key difference is the File field will be read-only, displaying the name of the file you are dropping on the gird. Click OK to confirm the import. If no errors are detected (e.g. JSON syntax errors), the contacts will be added to the grid.
Figure 472